While you clean and detail your unit, examine it with a fine-tooth comb. Let nothing go unnoticed. Quite often you will catch a problem in its most infant stage, before it becomes a big problem.
Take a leaky fork seal, for example. All bikes will encounter this inevitable condition. If you notice a leaky fork seal and take action to correct it immediately, you will save yourself valuable time and money. For around $150 a leaky fork seal can be professionally repaired. If this fork seal goes unnoticed, water can leak in and corrode the internal components, such as valves and springs. A simple, 45-minute fix could turn into a major repair that could cost hundreds of dollars, and rob you of valuable ride time—especially if parts have to be ordered in. If you do your repairs as they come, it quite often will make it easier on your wallet than if you were to commit to multiple repairs at once.
As you detail your unit, check your fluid levels. Not only will this help to maintain your unit, but you will know instantly if a more serious problem exists. To ignore fluid levels can result in your engine blowing up. No more bike and no more sled—gonzo, that quickly.
How to clean air filters
Air filters are a vital component of your dirt bike and require a detailed cleaning from time to time. It’s important to do it right.
Step 1: Remove air filter from bike and stuff a clean rag into the air intake. The clean rag will prevent any foreign matter from dropping into your engine.
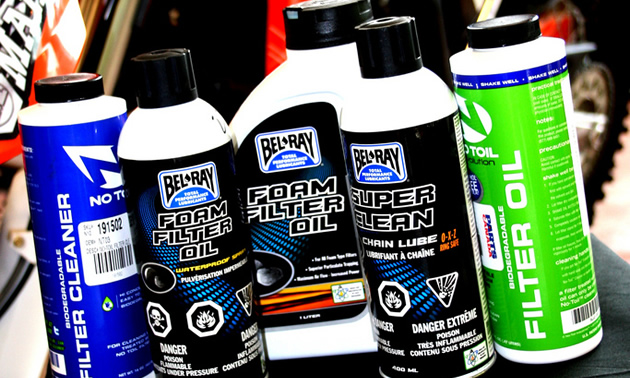
Step 2: Fill a bucket with warm water and add cleaner specifically designed to clean air filters. Justin generally uses Motorex or Notoil brands of cleaner.
Step 3: Gently knead and massage the soapy water into the filter. Do not wring the filter out when you are working in the cleaner as this can result in dirt and other foreign matter working its way deeper into your filter.
Step 4: Rinse the filter out with clean, warm water from the inside out to ensure all of the dirt washes out of the filter rather than embedding into the filter.
Step 5: Put your filter someplace where it can fully dry. It is important to allow sufficient time for the filter to dry. Don’t be impatient.
Step 6: Oil your filter. Some brands of filter oils are compatible with that same brand of cleaning products—make sure you are using the right ones. Your local parts person can lead you in the right direction. Oil from the inside out. When you are done, the filter should have a uniform oil colour throughout, red for Notoil and blue for Motorex.
Step 7: Remove the clean rag. I know, this may seem redundant, but you’d be surprised by the number of people who have forgotten to take the clean rag out of their bike. The result is complete disaster.


Comments